Hey there, Shopify store owners! Ready to give your online shop a little extra pizzazz? Let's talk about those nifty product labels - you know, the ones that scream "Sale!". These little guys can work wonders for your sales, helping customers spot great deals and fresh products in a snap.
Today, we're diving into how to add and remove these eye-catching badges in the BeYours Shopify theme. Trust me, it's easier than you think!
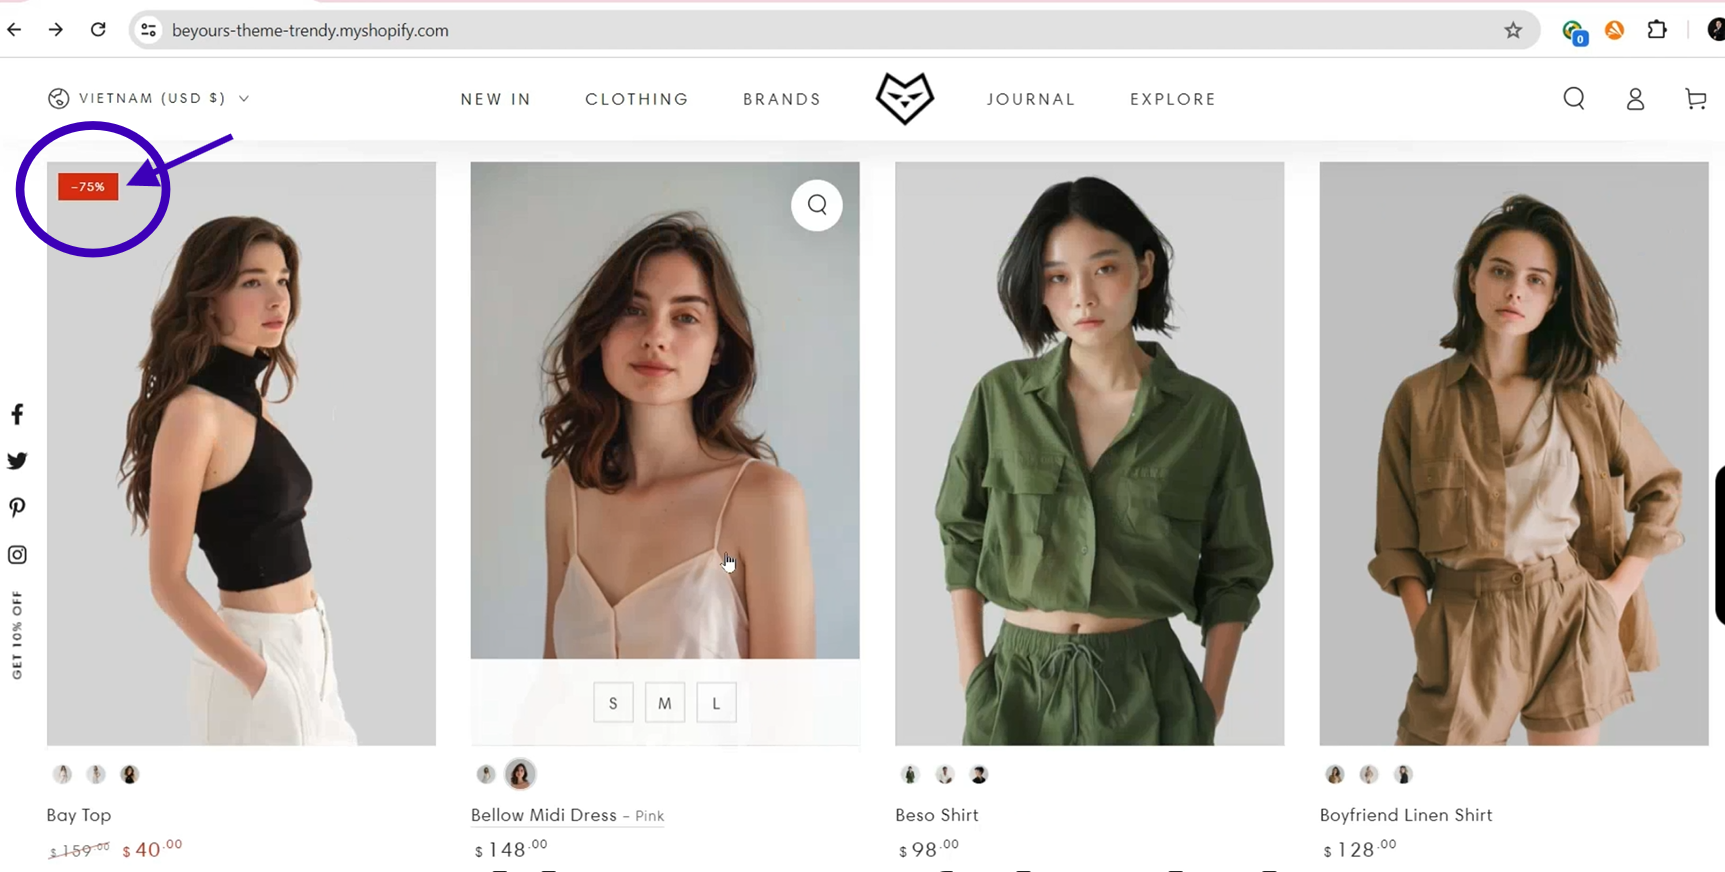
Shopify product page with a Sale badge highlighting a discount
Adding a Sale Badge: Your Step-by-Step Guide
Alright, let's roll up our sleeves and get that sale badge on your product. Here's how:
1. Find Your Way to Your Products
First things first, let's get to your products:
- Fire up your laptop and log into your Shopify admin dashboard.
- Look to your left - see that menu? Click on "Products".

Shopify management interface highlighting the "Products" option in the left-hand navigation menu
2. Pick Your Star Product
Now, let's choose the product you want to jazz up:
- Scroll through your product list and click on the lucky item getting the sale badge.

Shopify product list page with a specific product highlighted
3. Hunt Down the Pricing Section
Time to find where the magic happens:
- On your product's page, scroll down until you spot the "Pricing" section.

Shopify product details page with the "Pricing" section highlighted
4. Set Your Original Price
Let's show customers what a deal they're getting:
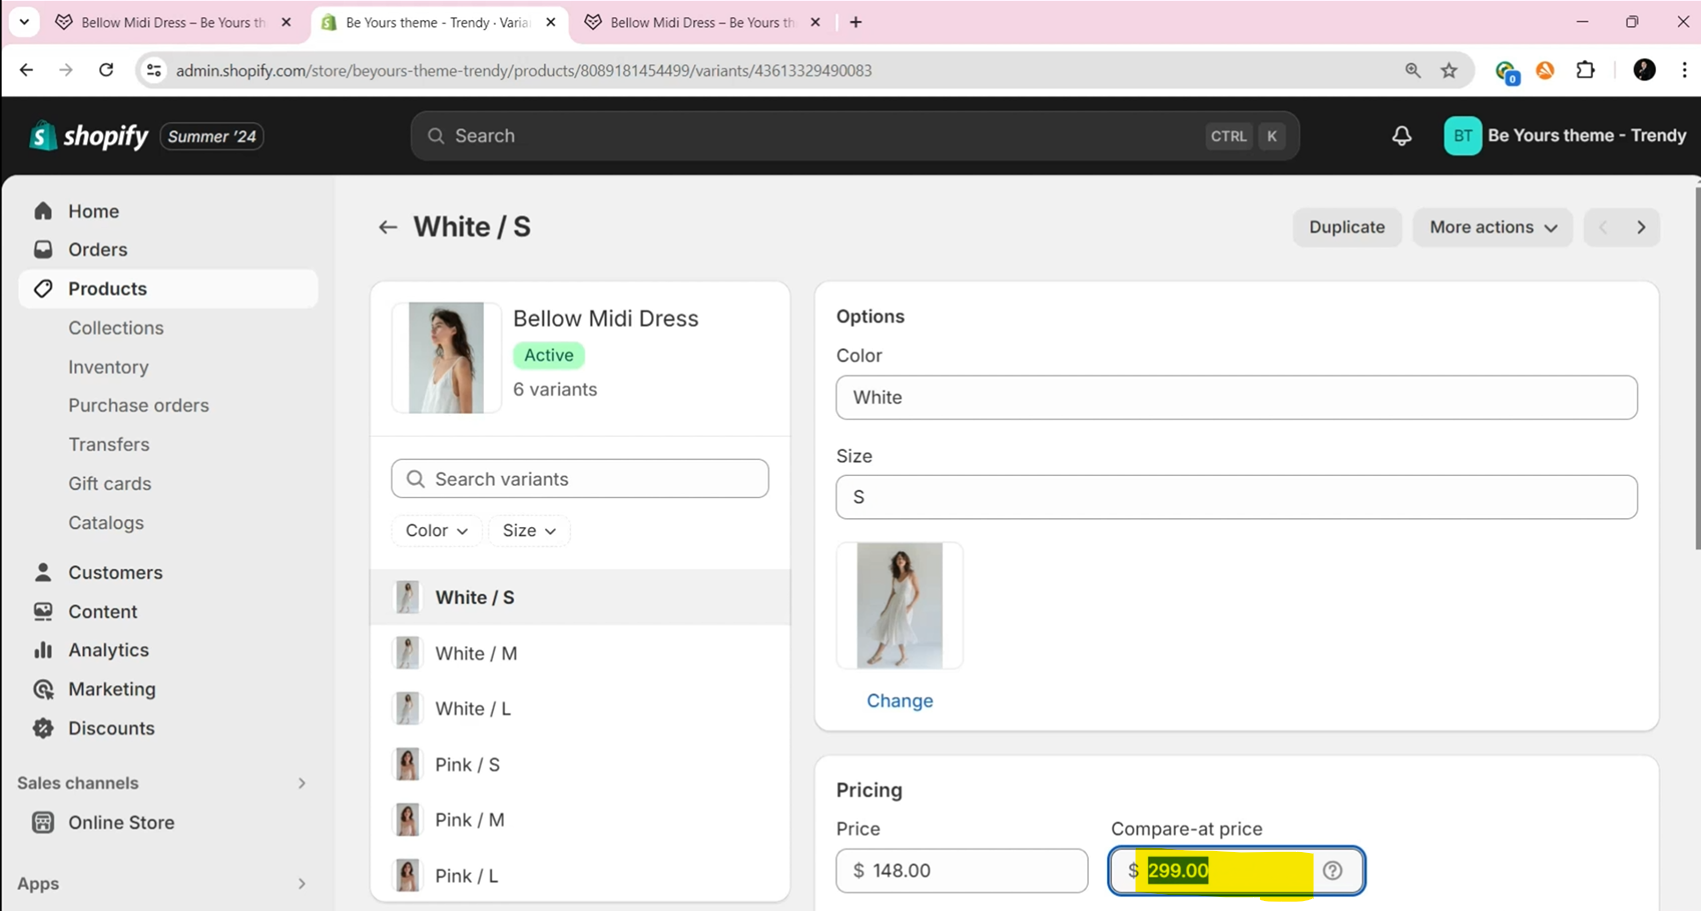
- Find the "Compare at price" field and pop in the original price.

Shopify product pricing section with the "Compare at price" field highlighted and a price entered
5. Add Your Irresistible Sale Price
Now for the exciting part:
- In the "Price" field, enter your new, lower sale price.
Shopify product pricing section with the "Price" field highlighted and a discounted price entered.
6. Save Your Handiwork
Don't forget this crucial step:
- Hit that "Save" button at the top right of the page.

Shopify product details page with the "Save" button highlighted.
7. Take a Sneak Peek
Let's see how it looks:
- Click "Preview" to check out your product page with its shiny new sale badge.

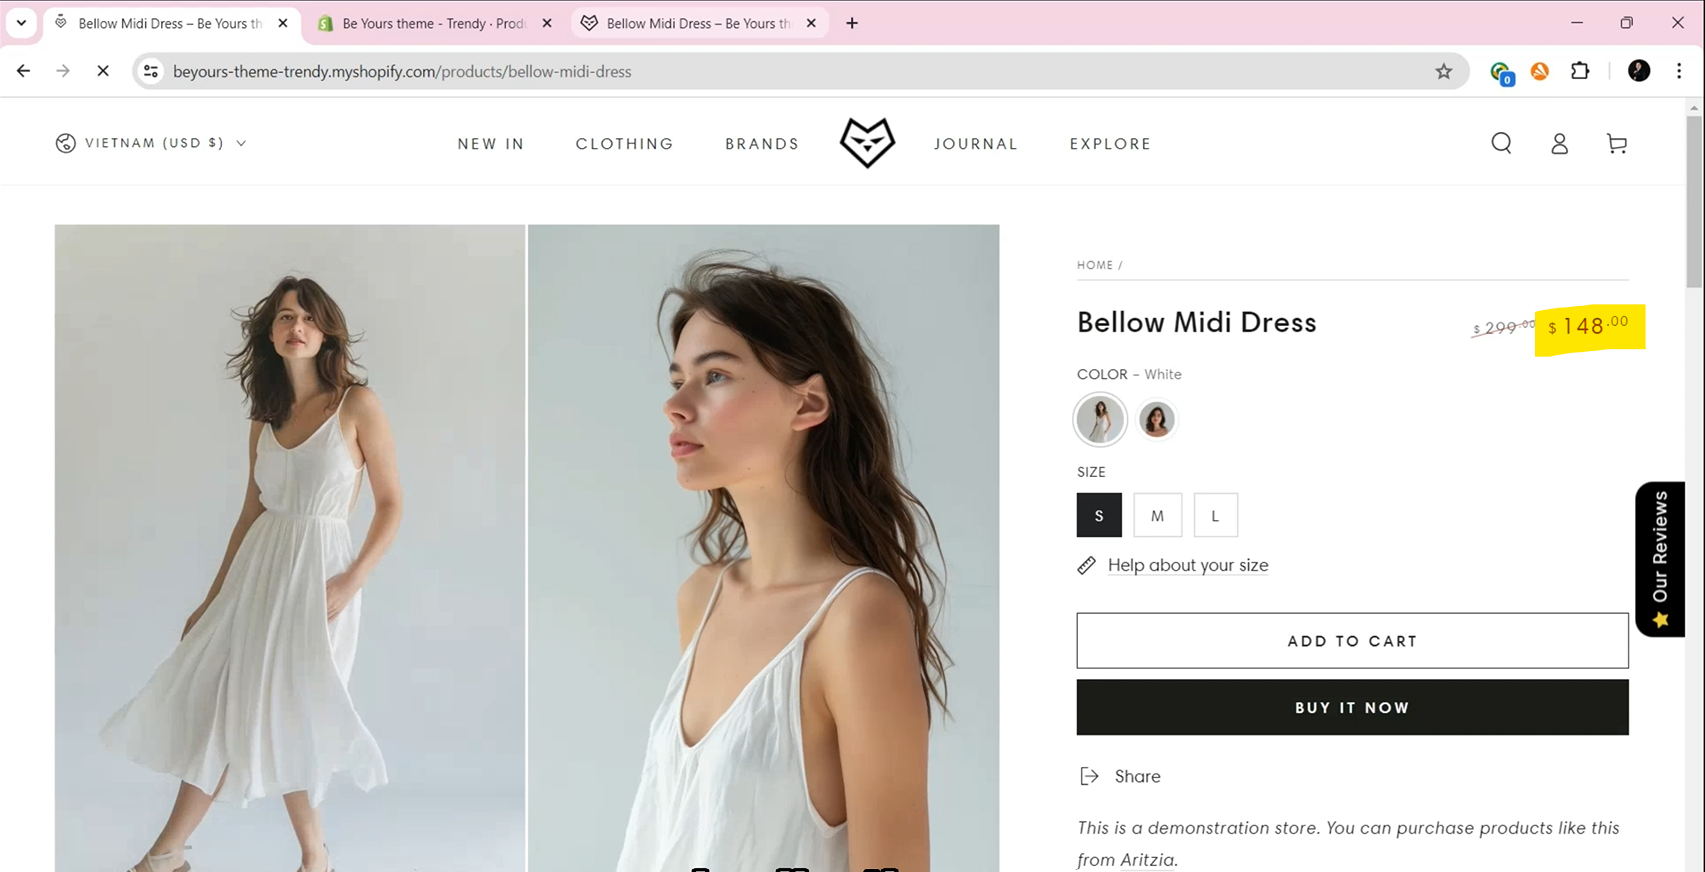
Shopify product page preview with a Sale badge displaying the discount percentage
Removing a Sale Badge: Quick and Easy
Sale's over? No worries, here's how to take down that badge:
1. Back to Your Products
Just like before, head to your products section.
2. Find That Pricing Section Again
Scroll down to the "Pricing" section on your product page.
3. Erase the Compare at Price
Here's the key step:
- Clear out the "Compare at price" field. Poof! No more discount reference.
Shopify product pricing section with the "Compare at price" field highlighted and instructions to delete the content
4. Save Those Changes
Don't forget to hit "Save" at the top right.
5. Double-Check Your Work
Use that "Preview" button to make sure the badge is gone.
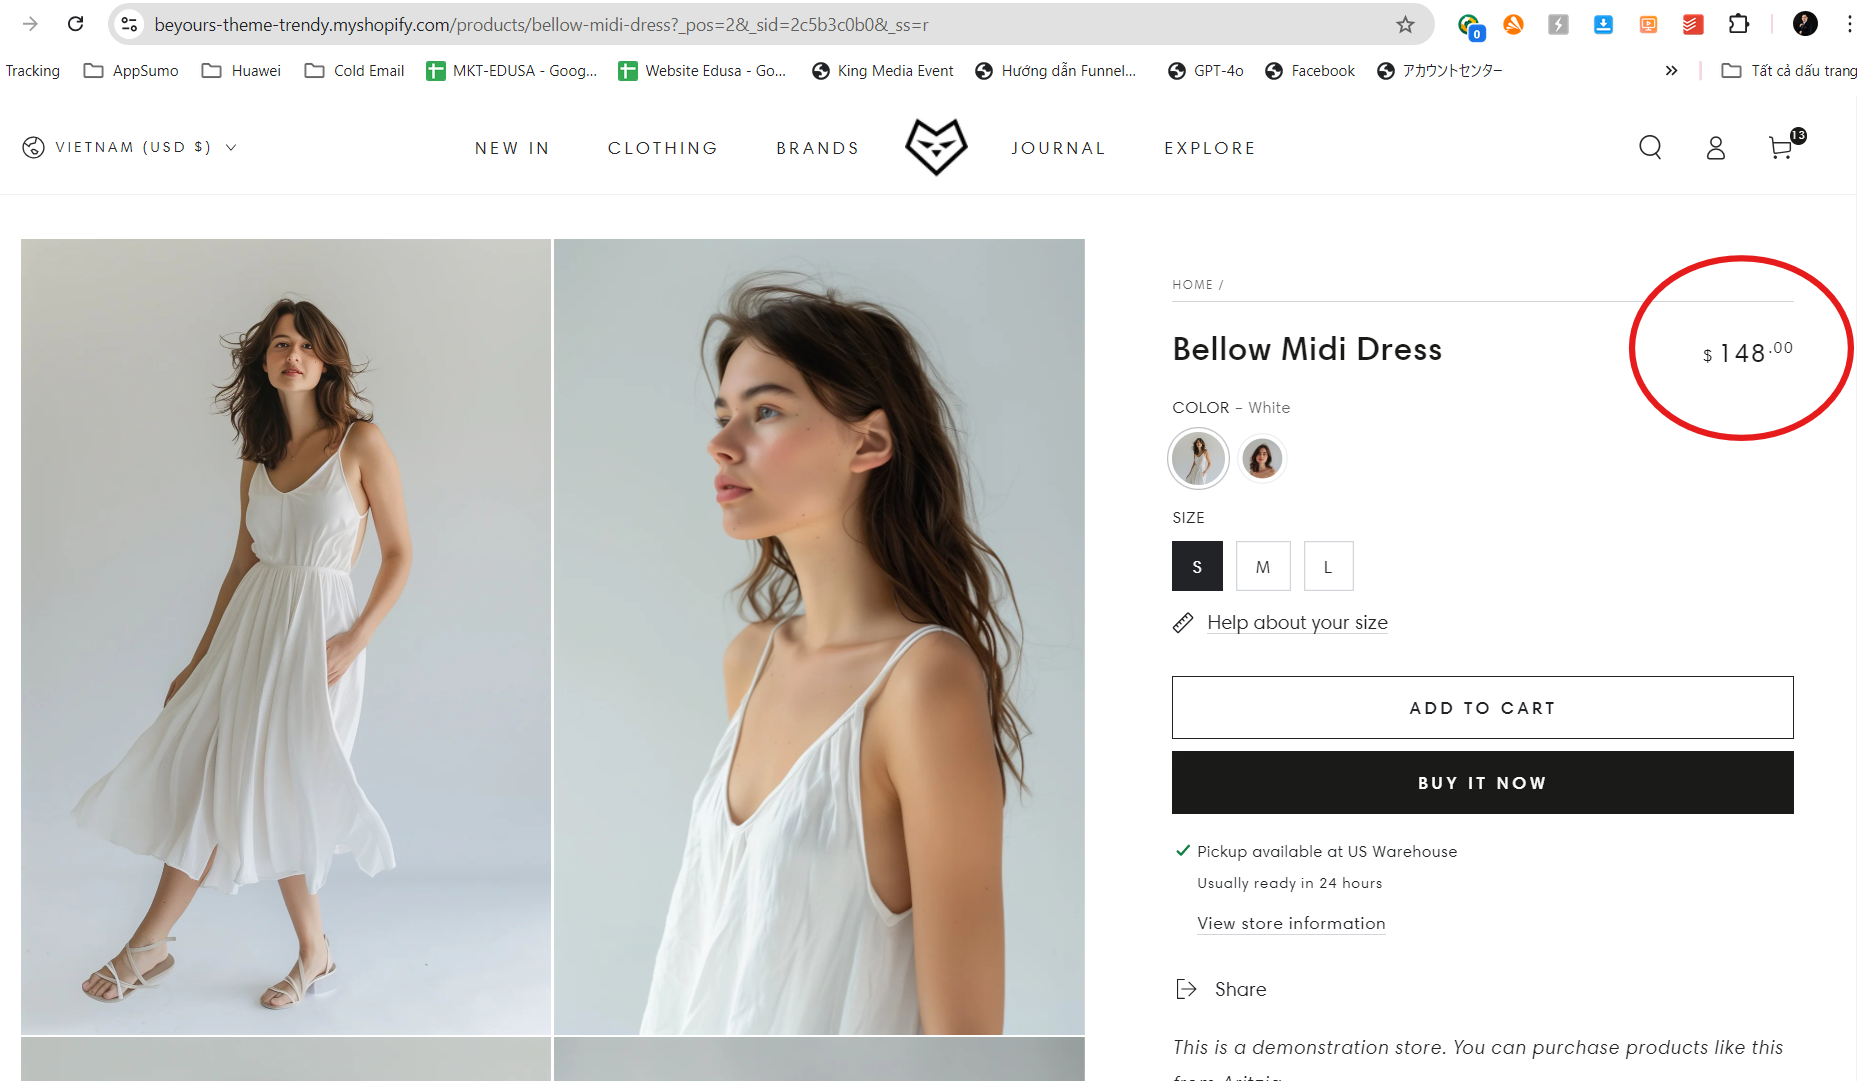
Shopify product page preview without a Sale badge
And there you have it! Adding and removing sale badges in the BeYours Shopify theme is a piece of cake, right? It's a simple yet powerful way to make your store pop and potentially boost those sales.
Need Further Assistance
If you encounter any issues or need additional help with your BeYours theme, please reach out to our support guys via our Ticket System for assistance within 8 hours.
Scan the QR code below to join our WhatsApp community for updates, news, and announcements.



Share:
Enable product filtering
How to enable and set up quick view?